The website of the Nitro Hat Controller
Hi-Hat Compatibility Choose the right Nitro Hat for your stand
Installation Guide How to assemble your Nitro Hat
FAQ All your questions answered
NitroBlog Updates on the project
Nitro Hat Installation Guide
This guide walks you through the complete assembly and installation of your Nitro Hat controller onto an Alesis 10” cymbal pad and a standard hi-hat stand. For compatibility with stands, check the Hi-hat compatibility page.
If you are struggling, just send me a message!
Parts overview
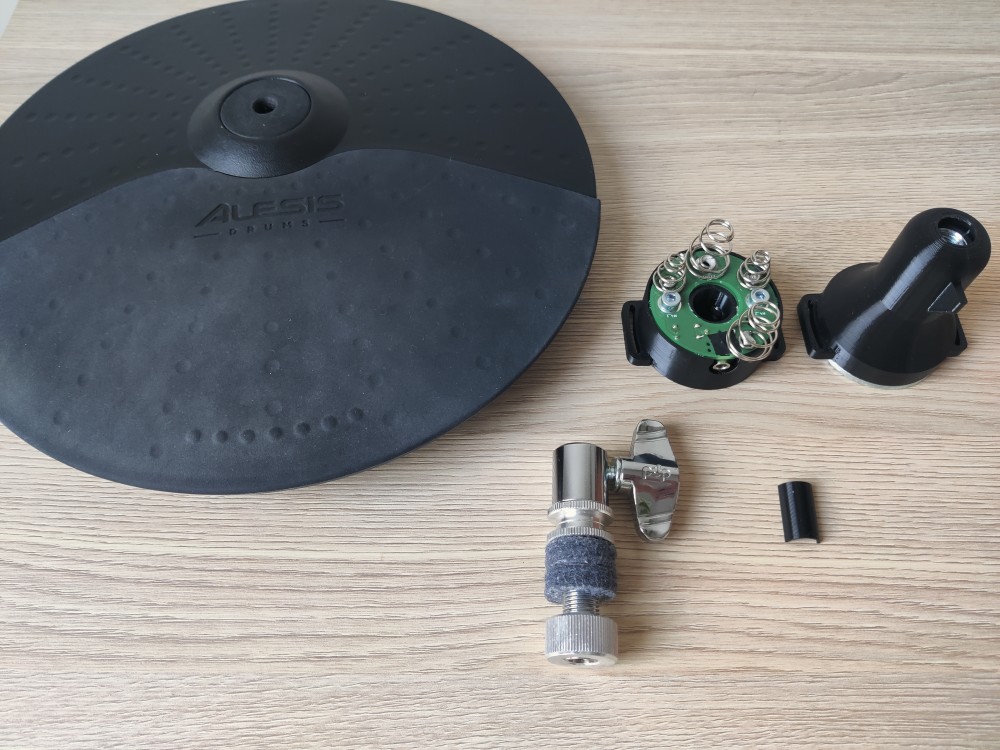
Before you start, lay out all the parts and make sure you have everything needed:
- Nitro Hat sensor module (Black housing with PCB and springs)
- Nitro Hat Cymbal mounting cone (black plastic, funnel-shaped)
- Alesis Hi-Hat Cymbal
- Hi-hat clutch
- Hi-hat stand (not in the photo)
- 2x Velcro Straps (not in the photo)
- Small black plastic clip
Tools Needed:
- Hex/Allen Key Size 3 (For American friends, size 7/64” should work)
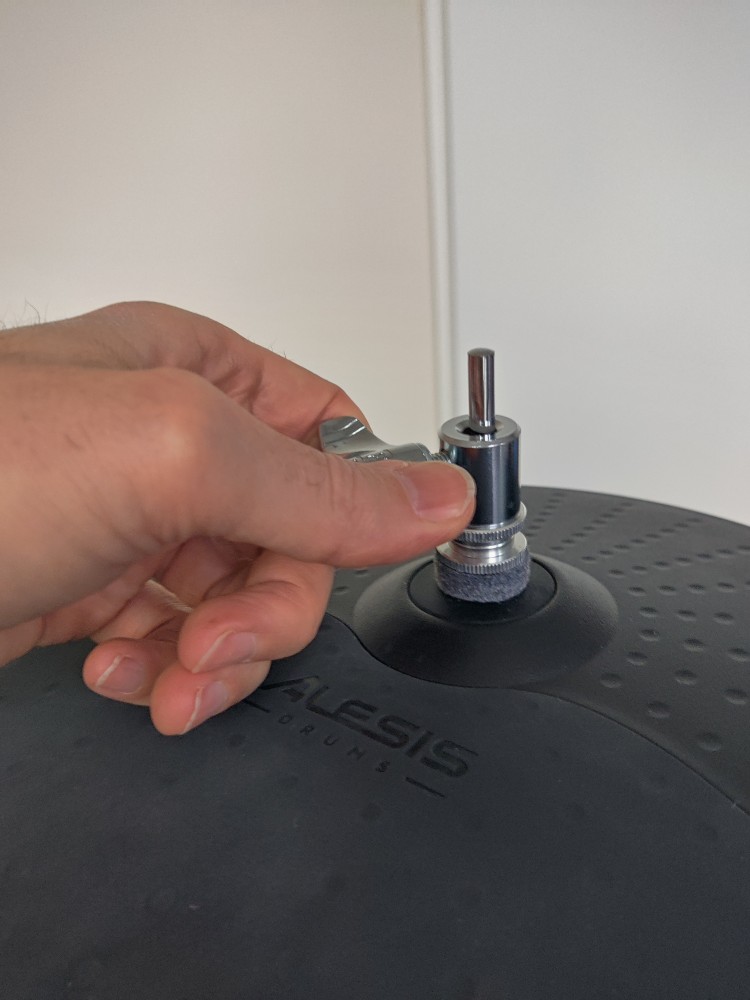
Step 1 – Prepare the clutch
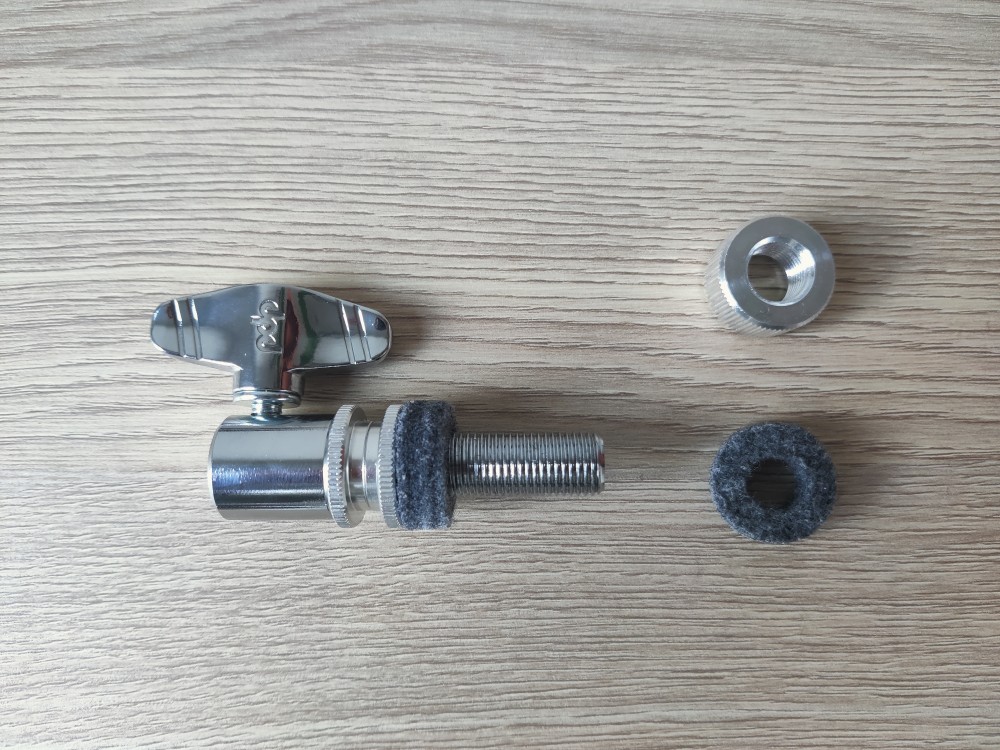
Take the hi-hat clutch bolt, and remove the bottom locking nut and one piece of felt. Keep the other felt in place.
Step 2 – Insert the bolt through the cymbal pad

Place the cymbal pad face-up (playing surface facing up). Insert the threaded rod of the clutch down through the centre hole of the cymbal pad. Apply pressure if needed, it’s rubber, it’s not going to break. The felt washer should rest flat against the top surface of the cymbal, cushioning the clutch body.
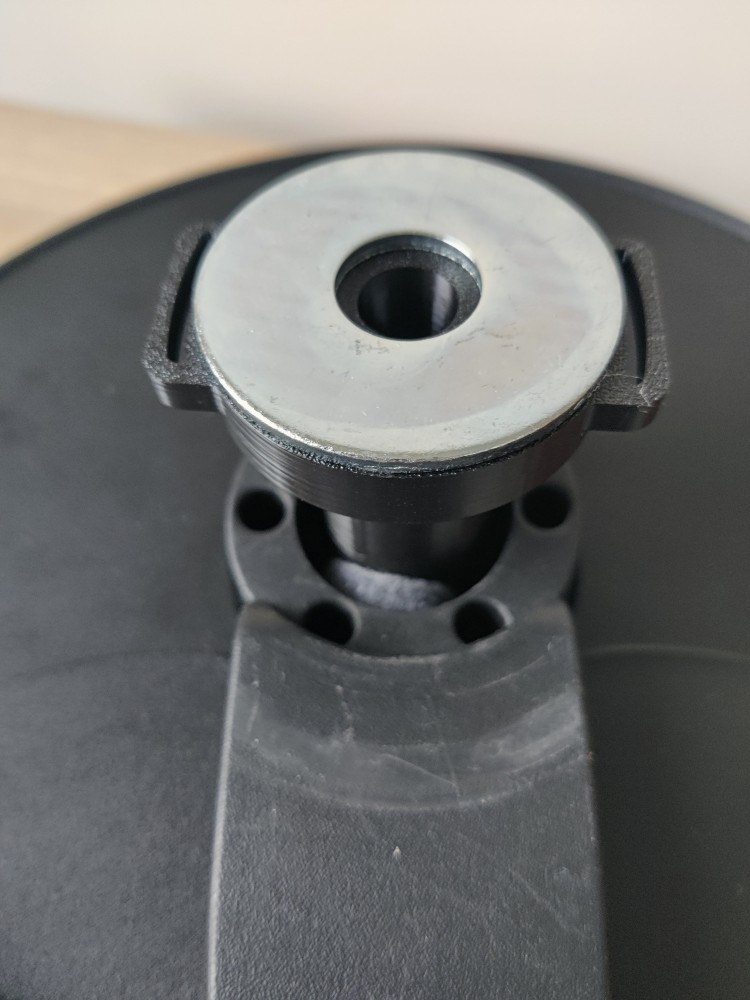
Step 3 – Check the bolt from below
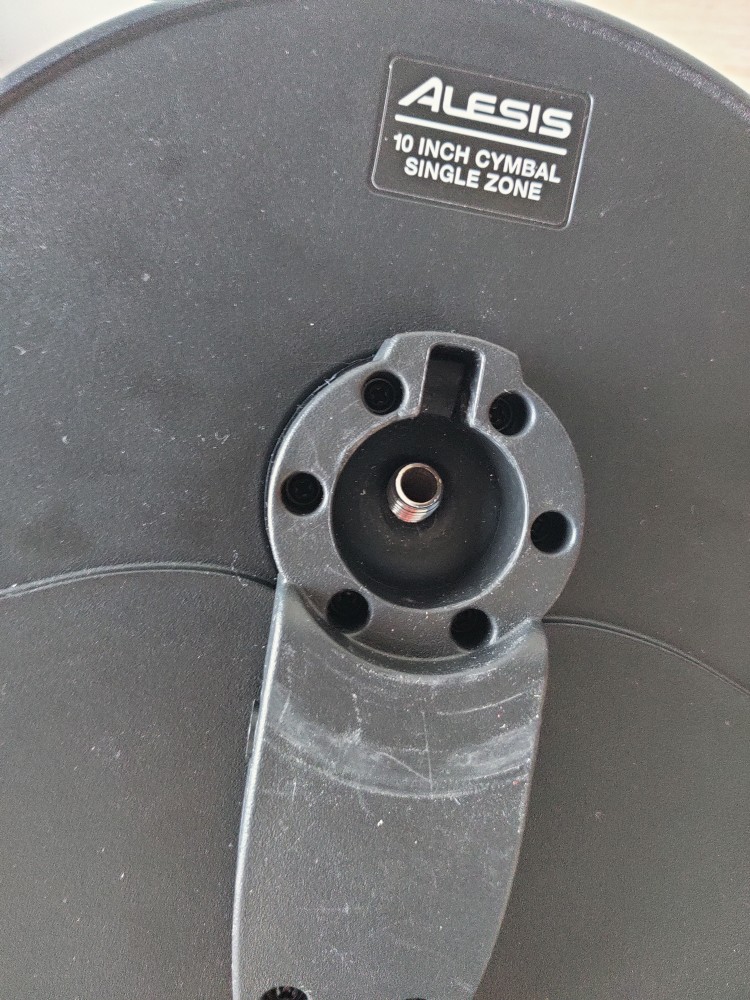
Flip the cymbal over. The threaded end of the rod should slightly protrude through the centre hub on the underside of the cymbal.
Step 4 – Place the felt washer on the underside
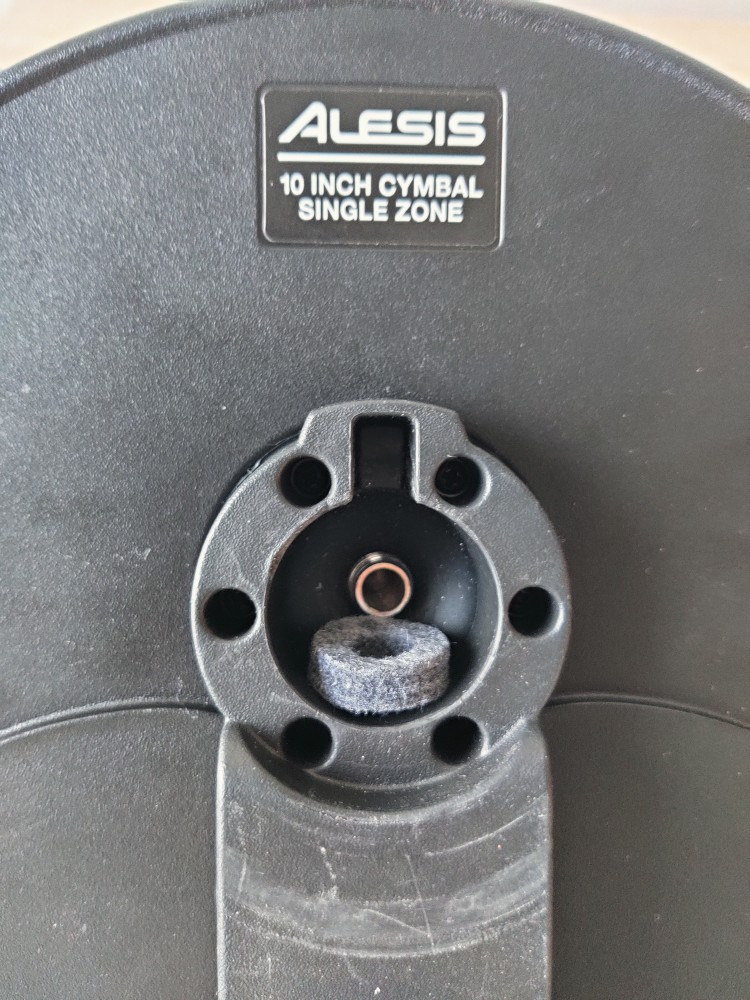
Slide the felt washer over the protruding threaded rod so that it sits down inside the recessed hub on the underside of the cymbal, facing the playing area. This washer prevents unwanted vibration transfer and allows the cymbal to move when hit. If your washer is too big, you can use a piece of carboard, felt or other vibration dampening material.
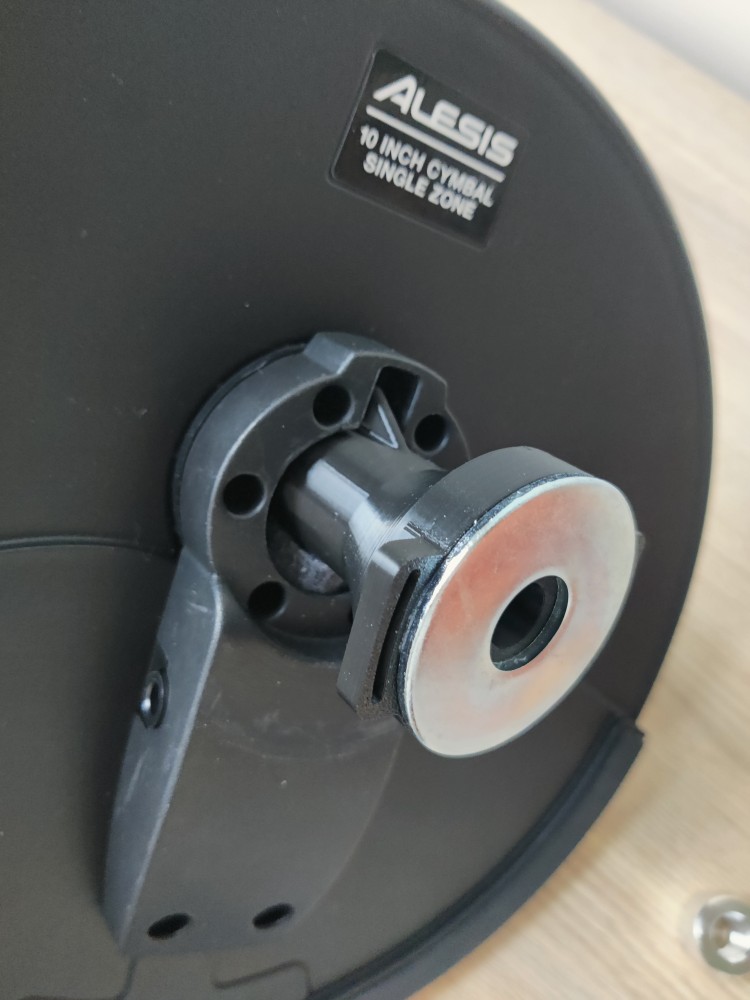
Step 5 – Attach the mounting cone
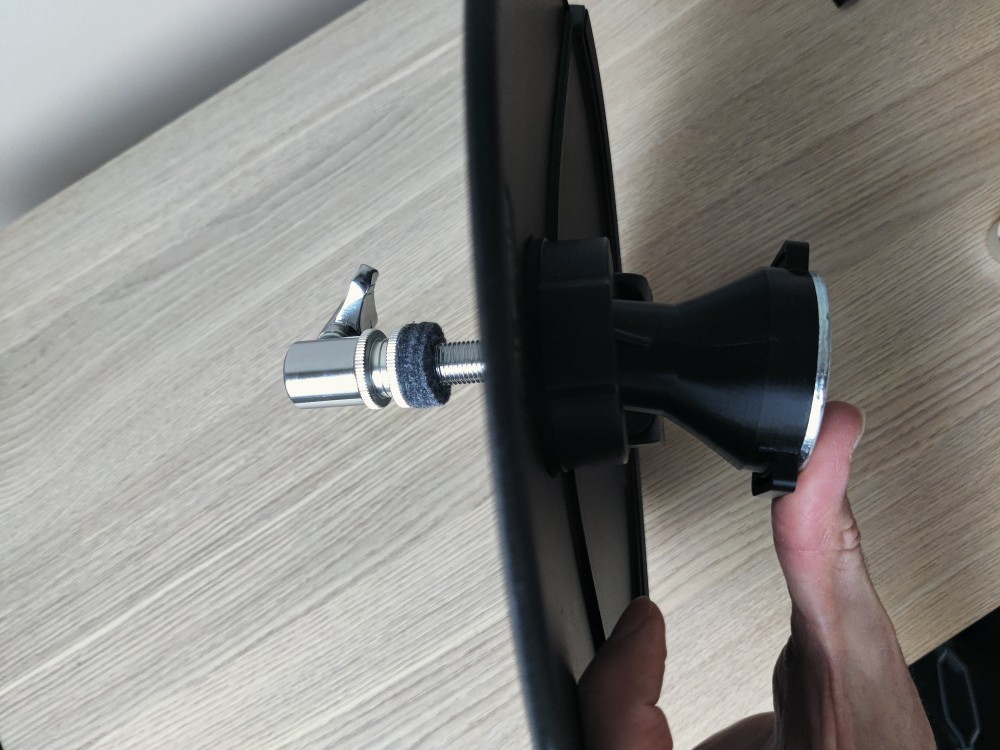
Thread the mounting cone (black funnel-shaped piece) onto the protruding rod from below. Align the black anti-rotation finn with the cutout of the Alesisy Cymbal. Turn the clutch bolt clockwise until the felt touches the cymbal rubber. DO NOT OVERTIGHTEN, keep play for movements when hit.
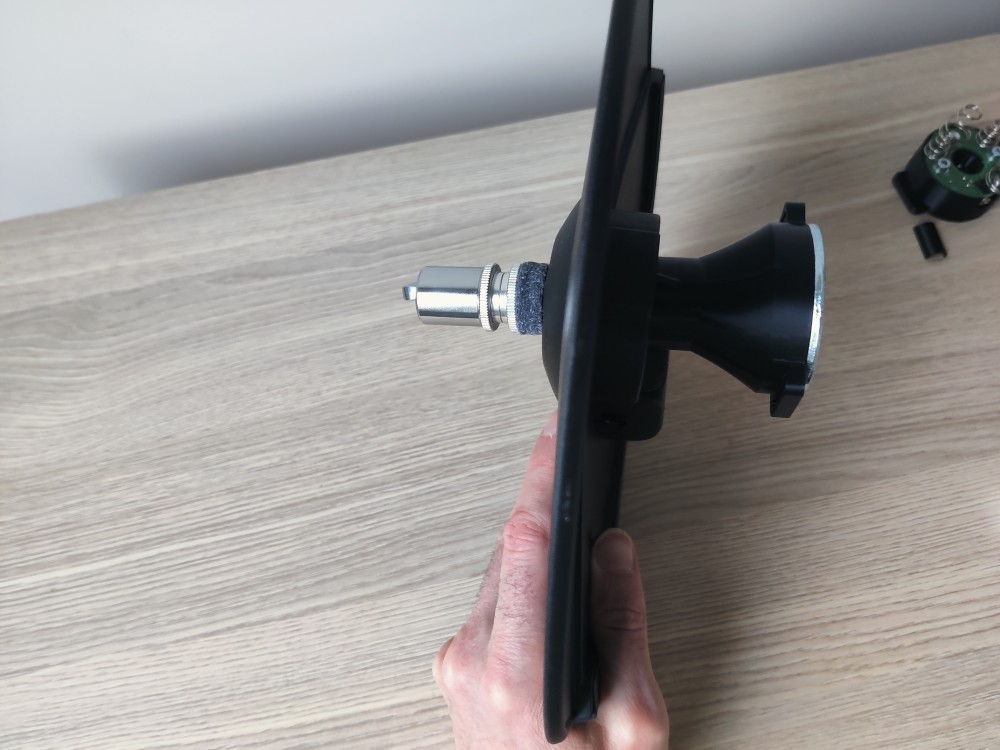
Step 6 – Inspect the completed cymbal assembly
Check that all parts are connected and properly aligned. The cymbal pad is now ready to be mounted onto the stand.
Step 7 – Place the sensor module on the hi-hat rod
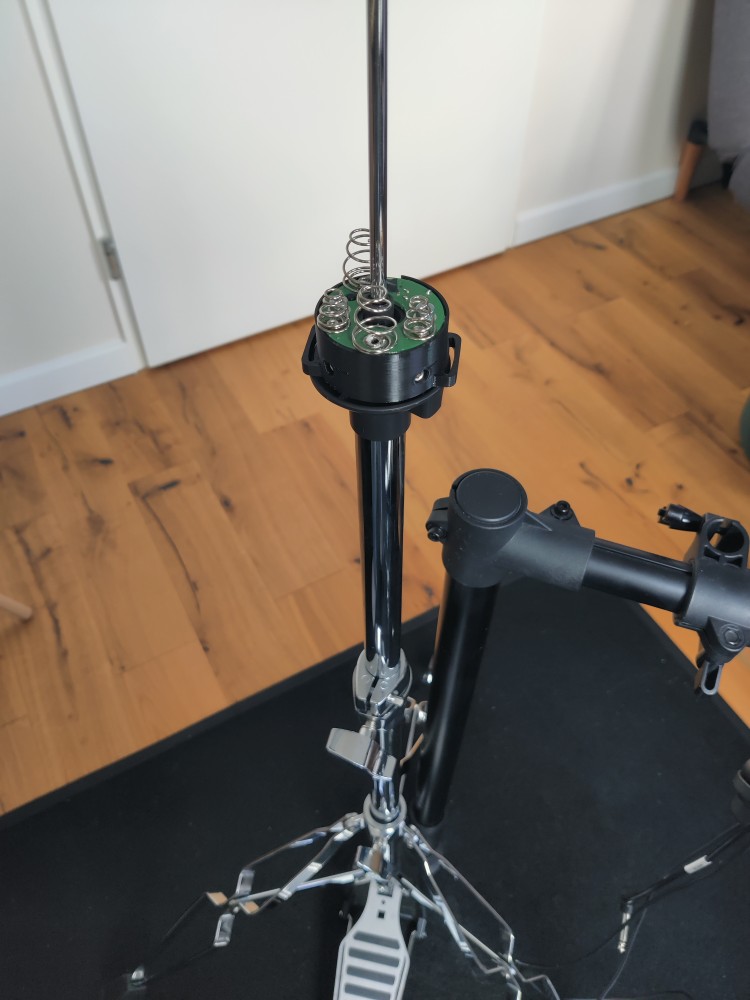
Set up your hi-hat stand as you normally would. Remove the felt from the bottom cymbal holder. Slide the Nitro Hat sensor module down over the top of the hi-hat rod (the vertical centre rod), with the springs side facing upward. The audio jack should face the backside of the stand, the Nitro Hat logo should face the front of the pedal, aligned with the foot.
Step 8 – Insert the plastic clip
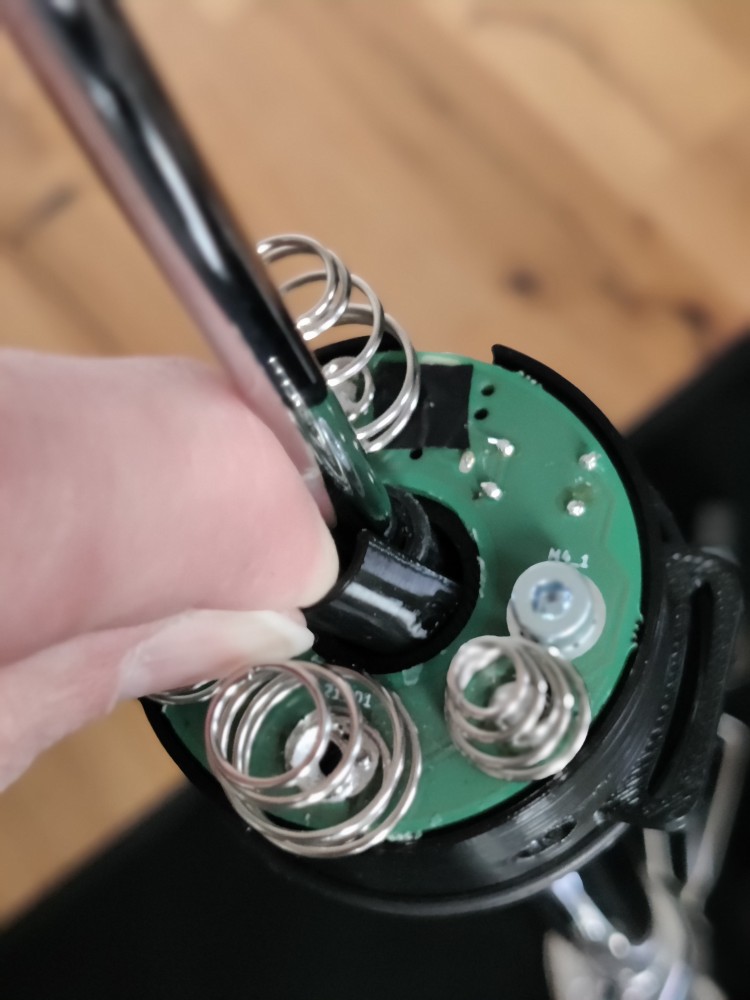
Press the small plastic clip into the centre hole of the sensor module facing the front half of the sensor.
Step 9 – Secure the module with the set screws
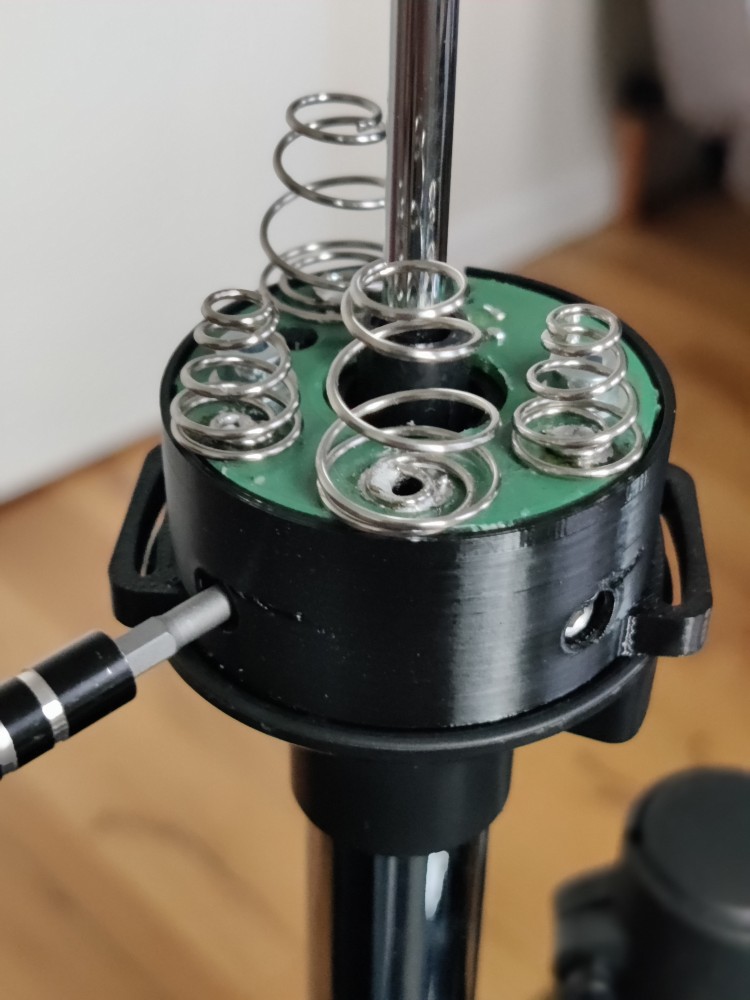
Using a hex/Allen key, tighten the set screws located on the side of the module housing. This locks the module firmly to the stand. Make sure the module sits level before fully tightening. DO NOT OVERTIGHTEN, just the right amount to keep it in place.
Note: when too tight, the pedal rod might struggle to travel up/down. Just set it in place firmly.
Step 10 – Lower the cymbal onto the stand
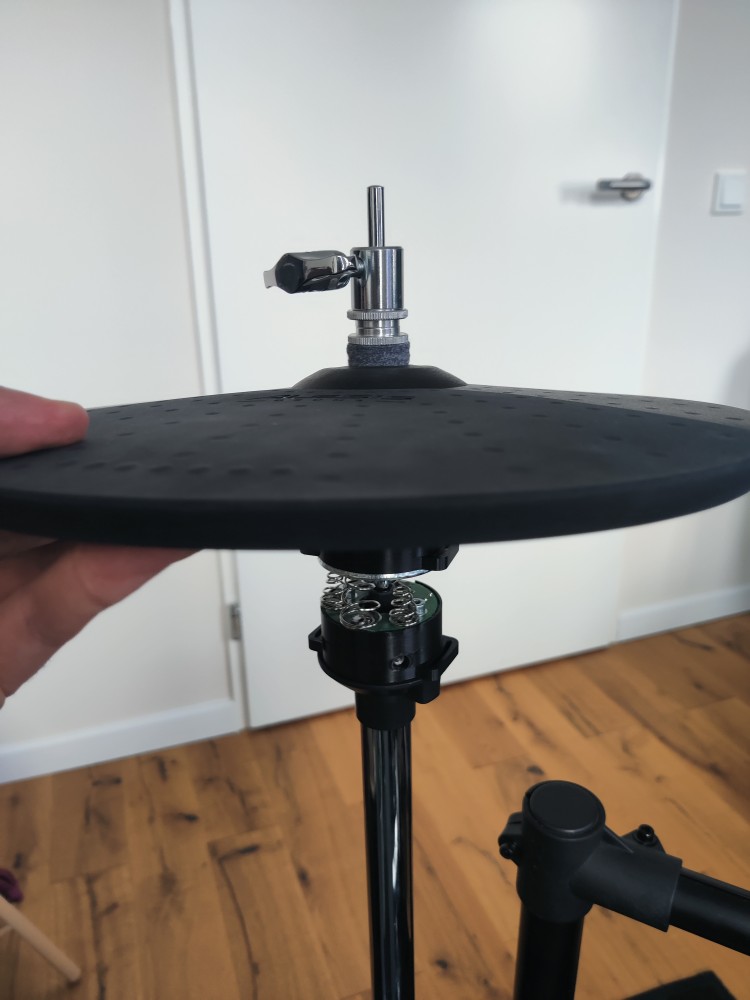
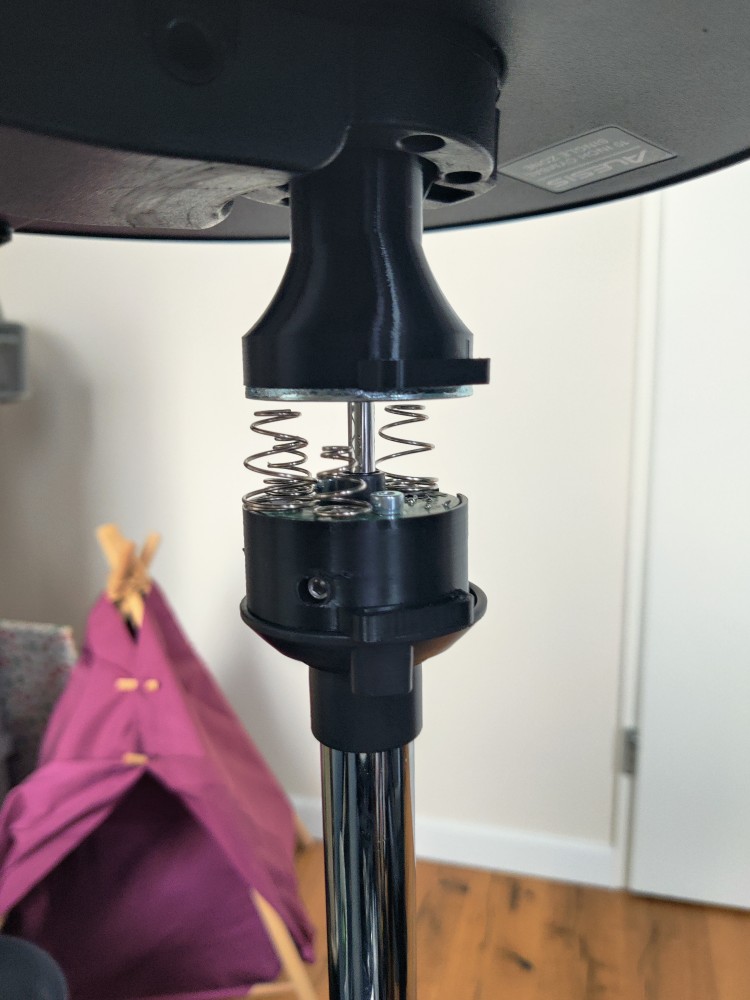
Hold the cymbal pad assembly (with cone and clutch already attached) and lower it down over the hi-hat rod so that the mounting cone slots into the top of the sensor module. The metal part of the cone should sit a few millimeters above the longer springs, without touching them.
Tighten the wing nut of the clutch.
Step 11 – Connect the anti-rotation straps
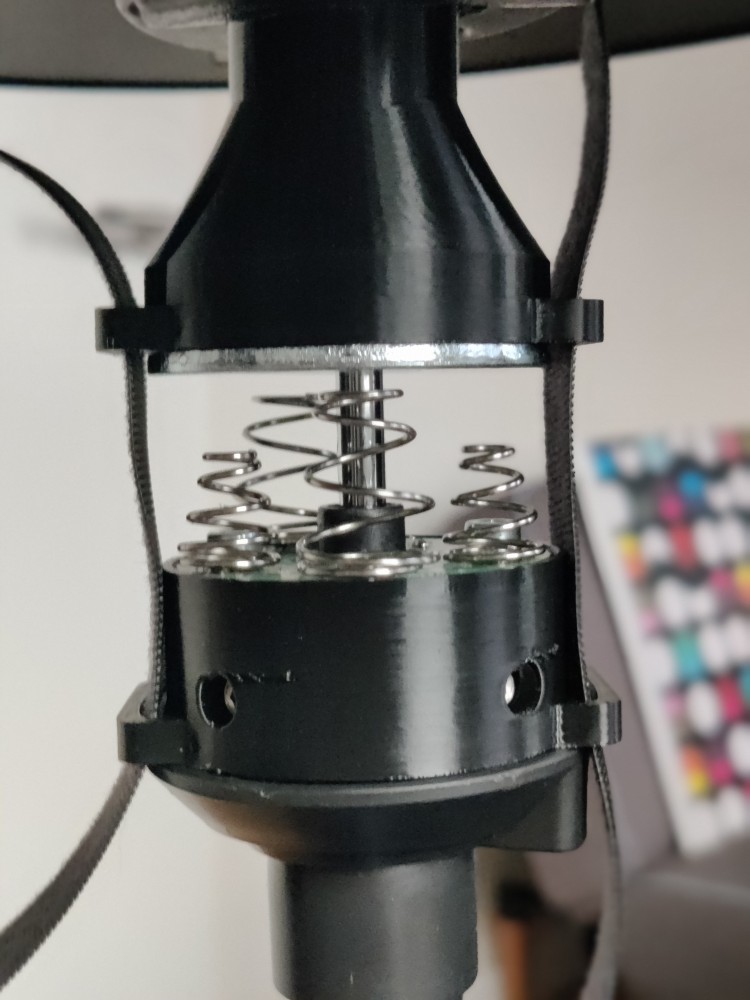
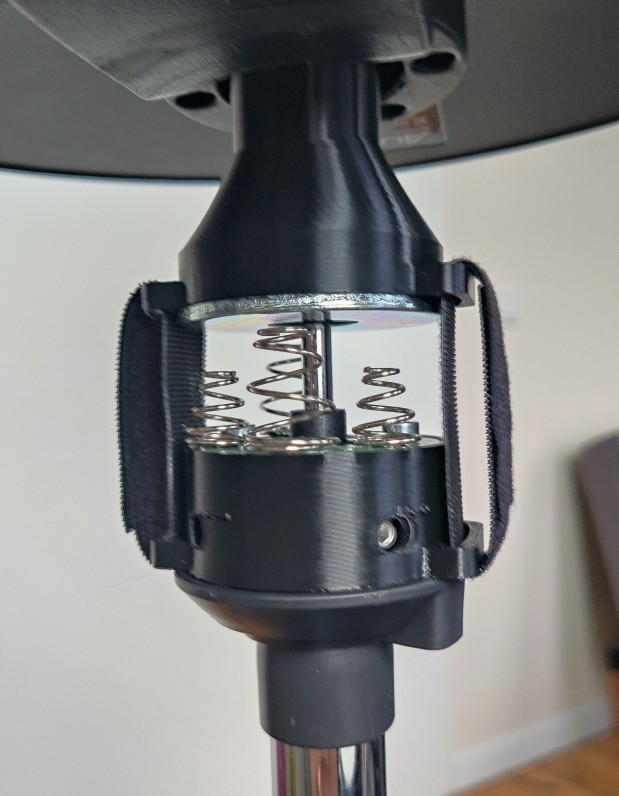
Insert the velcro straps trough the plastic cutouts, wrap them in place allowing small movments.
Step 12 – Connect the cables
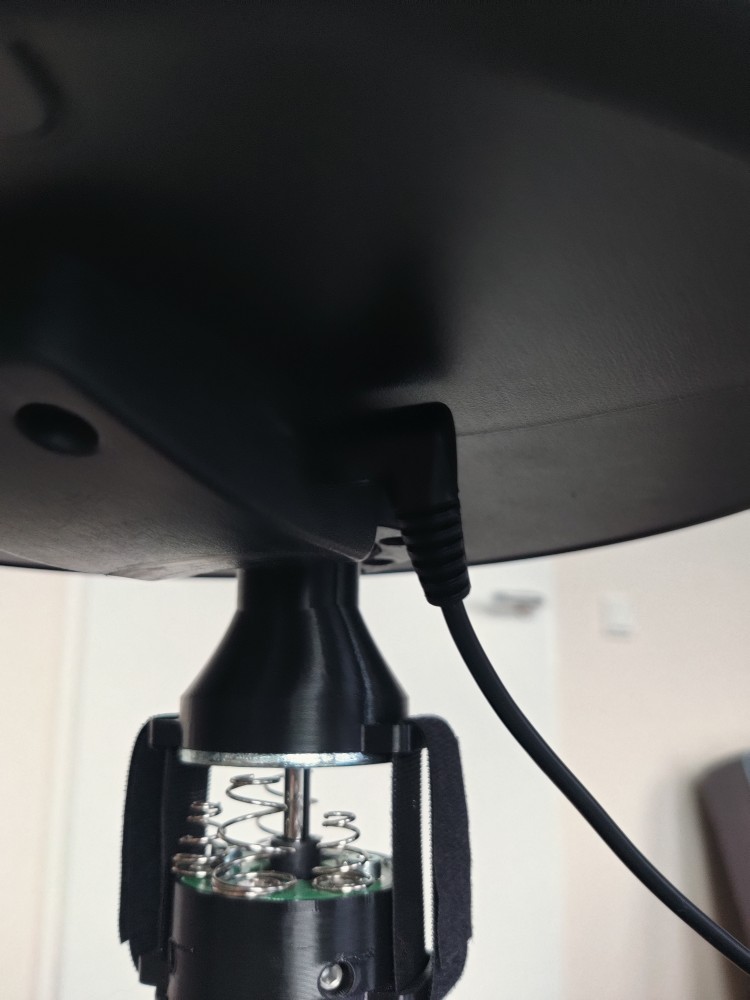

Plug the TRS (6.25 mm stereo) cable labelled Hi-Hat into the jack located on the underside of the cymbal pad. Route the cable neatly and allow enough cable to freely move when opening and closing. Connect the TRS (3.5 mm stereo) cable labelled HH controller into the jack located on the back of the Nitro Hat. For Alesis Nitro Pro, add the jack adaptor.
Done!
Your NitroHat is now fully installed. Turn on the Alesis drum module and you’re ready to play.
Tip: Adjust the height of the sensor module on the rod to fine-tune the open/closed feel of the hi-hat to your preference.